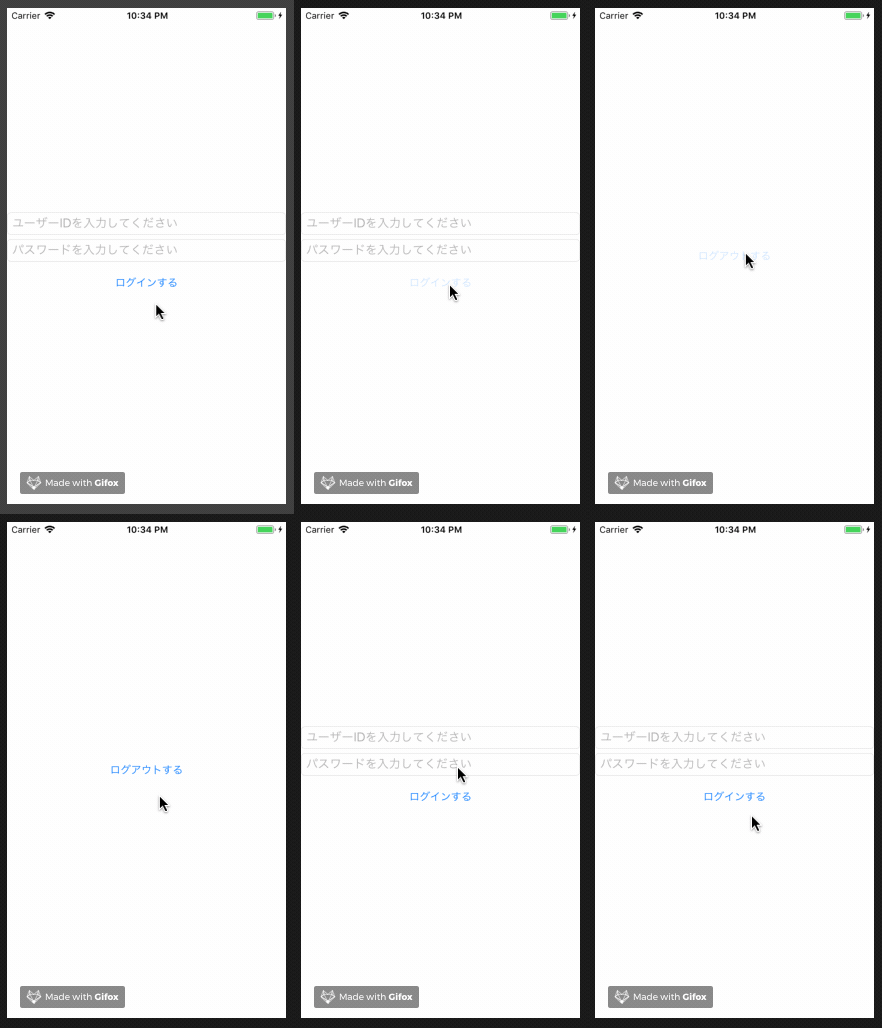
今回の記事ではデータバインディングによってLabelやEntryの表示・非表示を行い、さらにMVVMっぽくするところまでをやってみたいと思います。題材として以下のような動きをするアプリを考えてみることにします。

初めはユーザーIDとパスワードを入力する入力欄2つとログインボタン1つを表示しておき、ボタンを押すとログアウトするボタンのみが表示されます。これをクリックするごとに切り替えることとします。
データバインディング無しでコードビハインドに書く
まずは特に何も考えずにコードビハインドに記述してみましょう。
MainPage.xaml
<?xml version="1.0" encoding="utf-8"?>
<ContentPage xmlns="http://xamarin.com/schemas/2014/forms"
             xmlns:x="http://schemas.microsoft.com/winfx/2009/xaml"
             xmlns:local="clr-namespace:XF_MVVM"
             x:Class="XF_MVVM.MainPage">
    <StackLayout VerticalOptions="Center">
        <Entry x:Name="entry1"
               Placeholder="ユーザーIDを入力してください"/>
        <Entry x:Name="entry2"
               Placeholder="パスワードを入力してください"/>
        <Button x:Name="button1"
                Text="ログインする"
                Clicked="Handle_Clicked"/>
        <Button x:Name="button2"
                Text="ログアウトする"
                Clicked="Handle_Clicked"
                IsVisible="false"/>
    </StackLayout>
</ContentPage>
MainPage.xaml.cs
using System;
using Xamarin.Forms;

namespace XF_MVVM
{
    public partial class MainPage : ContentPage
    {
        public MainPage()
        {
            InitializeComponent();
        }

        void Handle_Clicked(object sender, EventArgs e)
        {
            entry1.IsVisible = !entry1.IsVisible;
            entry2.IsVisible = !entry2.IsVisible;
            button1.IsVisible = !button1.IsVisible;
            button2.IsVisible = !button2.IsVisible;
        }
    }
}
ボタンを押すごとにLabel、EntryのIsVisibleプロパティを否定します(Trueの場合はFalseに、Falseの場合はTrueにします)。一応これでも目的の動きを達成していますが、Handle_Clicked内の処理を見ると各要素に同じような処理をしていることがわかります。entry1、entry2、button1は常に同じ値になるので共通の値を参照するような形にしたほうが良さそうです。そこでデータバインディングを活用します。
データバインディングを設定する
データバインディングとは2つのオブジェクト間において、一方のプロパティが変更されたらもう一方のプロパティも変更する仕組みのようです。詳しくは以下をご覧ください。
データバインディングではソースとターゲットの二つの役割があります。基本的にはソースのプロパティの値が変更されたらターゲットのプロパティの値も自動的に変更されるようです。
先ほどのコードをデータバインディングするように変更してみます。
MainPage.xaml
<?xml version="1.0" encoding="utf-8"?>
<ContentPage xmlns="http://xamarin.com/schemas/2014/forms"
             xmlns:x="http://schemas.microsoft.com/winfx/2009/xaml"
             xmlns:local="clr-namespace:XF_MVVM"
             x:Class="XF_MVVM.MainPage">
    <StackLayout VerticalOptions="Center">
        <Entry Placeholder="ユーザーIDを入力してください"
               IsVisible="{Binding IsLogin}"/>  <!-- 追加 -->
        <Entry Placeholder="パスワードを入力してください"
               IsVisible="{Binding IsLogin}"/>  <!-- 追加 -->
        <Button Text="ログインする"
                Clicked="Handle_Clicked"
                IsVisible="{Binding IsLogin}"/>  <!-- 追加 -->
        <Button Text="ログアウトする"
                Clicked="Handle_Clicked"
                IsVisible="{Binding IsLogout}"/>  <!-- 追加 -->
    </StackLayout>
</ContentPage>
「追加」となっている場所ではターゲットを指定しています。それぞれのIsVisibleプロパティが、ソースのIsLoginまたhIsLogoutプロパティと同期するようにしています。
次にコードビハインドを見てみましょう。
MainPage.xaml.cs
using System;
using System.Collections.Generic;
using System.Linq;
using System.Text;
using System.Threading.Tasks;
using Xamarin.Forms;

namespace XF_MVVM
{
    public partial class MainPage : ContentPage
    {
        public MainPage()
        {
            InitializeComponent();

            //ソースの指定
            BindingContext = this;
        }

        public bool IsLogin { get; set; } = true;

        public bool IsLogout { get; set; } = false;

        //ボタンを押すと各プロパティの値が否定される
        void Handle_Clicked(object sender, EventArgs e)
        {
            IsLogin = !IsLogin;
            IsLogout = !IsLogout;
        }
    }
}
BindingContextによってソースとなるオブジェクトの指定を行っています。
以上をまとめると、2つのEntry要素と「ログインする」LabelはIsLoginプロパティを基に、「ログアウトする」LabelはIsLogoutプロパティを基に値が決まるという設定をしました。
動きを確認してみましょう。

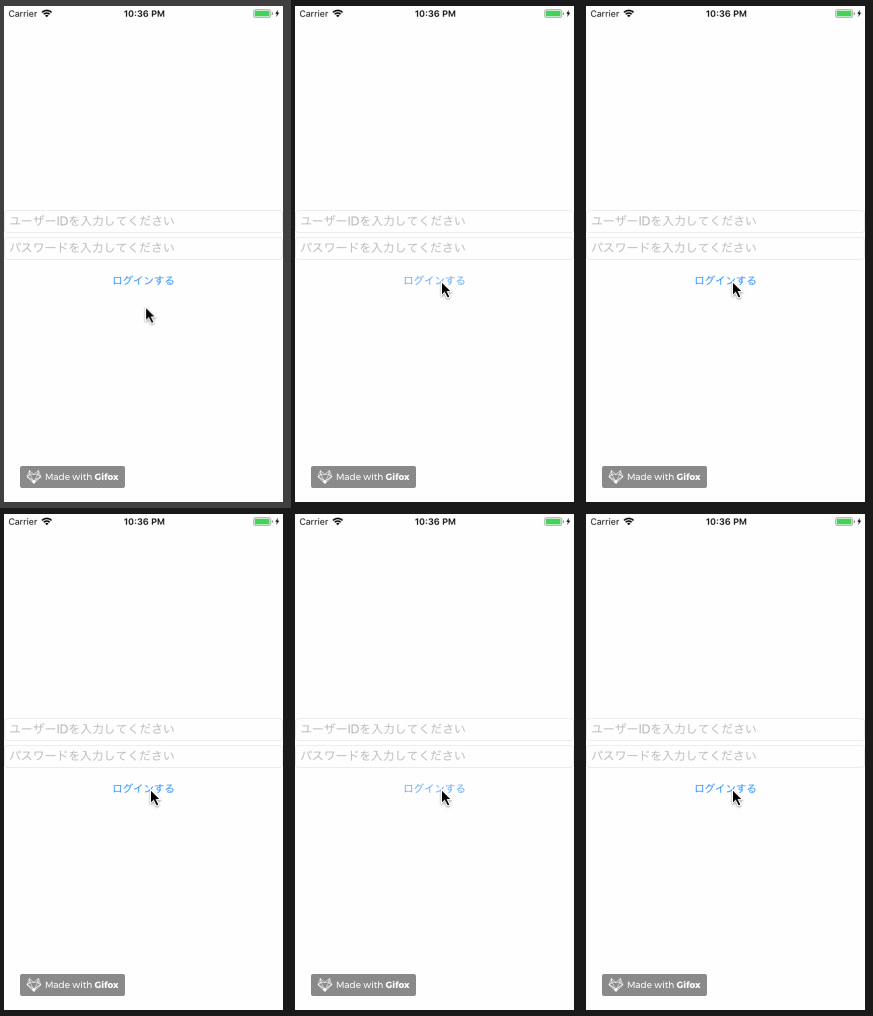
ボタンを押しても何も変化しません。しかしVisualStudioで確認するとIsLogin、IsLogoutそれぞれのプロパティはボタンを押すと値が変化します。
なぜこうなるかといいますと、今回の場合、ソースの値が変化してもターゲットに通知されないためです。そのため変更を通知するためにソースにINotifyPropertyChangedを実装する必要があります。
INotifyPropertyChangedの実装
実装すると以下のようになります。(MainPage.xamlは変更なしのため省略)
MainPage.xaml.cs
using System;
using System.ComponentModel;
using Xamarin.Forms;

namespace XF_MVVM
{
    public partial class MainPage : ContentPage
    {
        Control control = new Control();

        public MainPage()
        {
            InitializeComponent();
            BindingContext = control;
        }

        void Handle_Clicked(object sender, EventArgs e)
        {
            control.IsLogin = !control.IsLogin;
            control.IsLogout = !control.IsLogout;
        }
    }

    public class Control : INotifyPropertyChanged
    {
        public event PropertyChangedEventHandler PropertyChanged;

        private bool isLogin = true;
        public bool IsLogin
        {
            get { return isLogin; }
            set
            {
                isLogin = value;
                PropertyChanged?.Invoke(this, new PropertyChangedEventArgs(nameof(IsLogin)));
            }
        }

        private bool isLogout;
        public bool IsLogout
        {
            get { return this.isLogout; }
            set
            {
                isLogout = value;
                PropertyChanged?.Invoke(this, new PropertyChangedEventArgs(nameof(IsLogout)));
            }
        }
    }
}
INotifyPropertyChangedを継承したControlクラスを新しく作ります。
※INotifyPropertyChangedについて詳しくは以下をご覧ください。
MainPage.xaml.csクラスでControlクラスのインスタンスを作り、このインスタンスをソースに指定します。こうすれば変更が通知されるはずです。

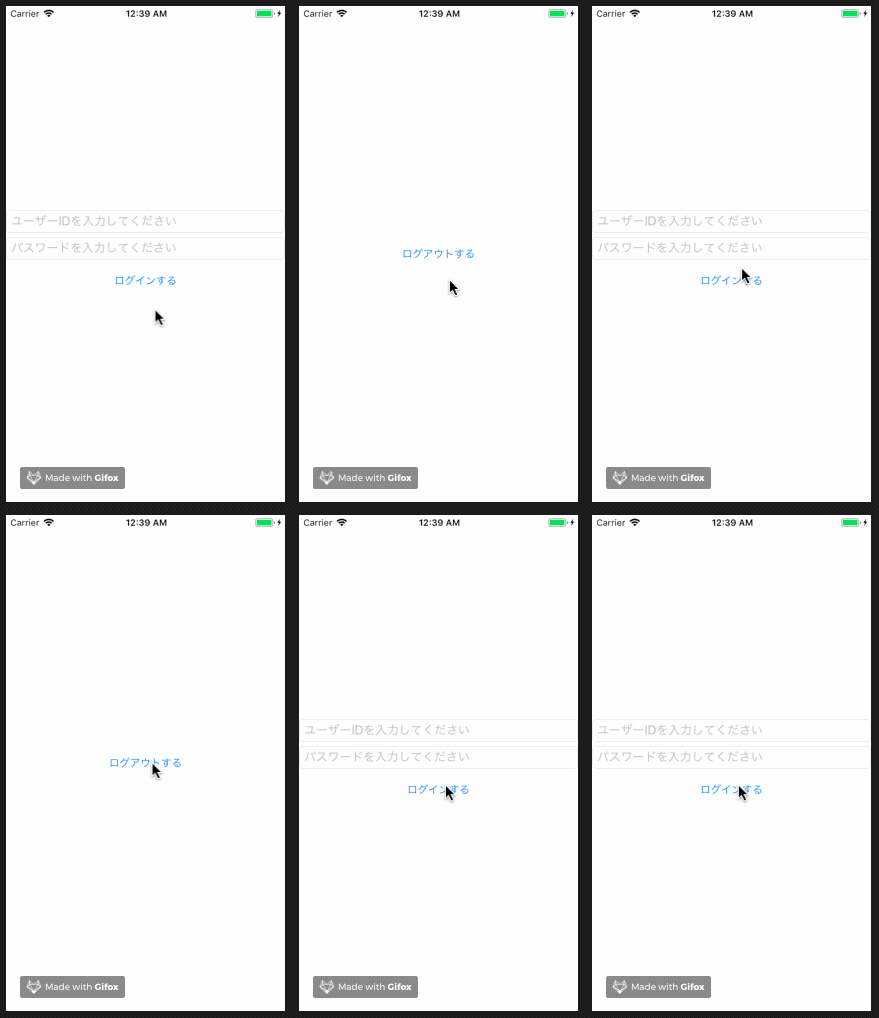
うまく動きました!
MVVMに書き換えてみる
以上のようなコードでも良さそうですが、ビューのファイルに画面と画面を操作するコードが混在して書かれているので、これを分離してみたいと思います。
MainPage.xaml
<?xml version="1.0" encoding="utf-8"?>
<ContentPage xmlns="http://xamarin.com/schemas/2014/forms"
             xmlns:x="http://schemas.microsoft.com/winfx/2009/xaml"
             xmlns:local="clr-namespace:XF_MVVM"
             x:Class="XF_MVVM.MainPage">
    <StackLayout VerticalOptions="Center">
        <Entry Placeholder="ユーザーIDを入力してください"
               IsVisible="{Binding IsLogin}"/>
        <Entry Placeholder="パスワードを入力してください"
               IsVisible="{Binding IsLogin}"/>
        <Button Text="ログインする"
                IsVisible="{Binding IsLogin}"
                Command="{Binding LoginLogout}"/>  <!-- 追加 -->
        <Button Text="ログアウトする"
                IsVisible="{Binding IsLogout}"
                Command="{Binding LoginLogout}"/>  <!-- 追加 -->
    </StackLayout>
</ContentPage>
クリック時の処理をコードビハインド以外に記述する場合はClickedが使えないので代わりにCommandを使います。
*Commandについて詳しくは以下をご覧ください
docs.microsoft.com
MainPage.xaml.cs
using Xamarin.Forms;

namespace XF_MVVM
{
    public partial class MainPage : ContentPage
    {
        public MainPage()
        {
            InitializeComponent();
            BindingContext = new MainPageViewModel();
        }
    }
}
MainPageViewModel.cs
using System.ComponentModel;
using Xamarin.Forms;

namespace XF_MVVM
{
    public class MainPageViewModel : INotifyPropertyChanged
    {
        public event PropertyChangedEventHandler PropertyChanged;

        private bool isLogin = true;
        public bool IsLogin
        {
            get { return isLogin; }
            set
            {
                isLogin = value;
                PropertyChanged?.Invoke(this, new PropertyChangedEventArgs(nameof(IsLogin)));
            }
        }

        private bool isLogout;
        public bool IsLogout
        {
            get { return this.isLogout; }
            set
            {
                isLogout = value;
                PropertyChanged?.Invoke(this, new PropertyChangedEventArgs(nameof(IsLogout)));
            }
        }

        public Command LoginLogout { get; }

        public MainPageViewModel()
        {
            LoginLogout = new Command(() =>
            {
                IsLogin = !IsLogin;
                IsLogout = !IsLogout;
            });
        }
    }
}
コードビハインドに書いていたControlクラスに変わってMainPageViewModelクラスを新しく作ります。
そしてMainPage.xaml.csでMainPageViewModelクラスをBindingContextに指定すれば完了です。これによってコードビハインド(MainPage.xaml.cs)がスッキリしましたね。
まとめ
以上のように役割によってクラスを分けると理解しやすいコードになるのではないかと思いました。今まではコードビハインドにほとんどのコードを書いていたのですが、ファイルを分けた方が自分の頭が混乱しなくていいですね。